[WordPress]カスタムSNSボタンで画像付きツイートを行うTwitterボタンの作成方法
WordPressでカスタムSNSボタンを利用した「画像付きツイートを行うことができる」Twitterシェアボタンの作成方法を紹介いたします。
目次- SNS Count Cacheのインストール
- icomoonをWordPressに導入
- Social Networks Auto-Poster
- TwitterのDevサイトからアプリを作成
- プラグインへの設定
- カスタムSNSボタンの作成
- 画像付きツイートボタンのTips
Contents
- 1. SNS Count Cacheのインストール
カスタムSNSボタンを設置するにあたって「SNS Count Cache」プラグインをインストールして、ソーシャルメディアでのシェア数を取得できるようにします。
WordPressのプラグインの追加から「SNS Count Cache」と検索してインストールします。
参考に作者まるぼんさんのサイトを載せておきます。SNS Count Cache | 試行錯誤ライフハック
インストールするとダッシュボード左側に「SNS Count Cache」の項目が追加されます。
自分の場合、「Settings」から以下のものを設定しています。「Share Base Cache」で「Target SNS」のすべてをチェックし、「Interval cheking and caching share count (sec)」を300にしています。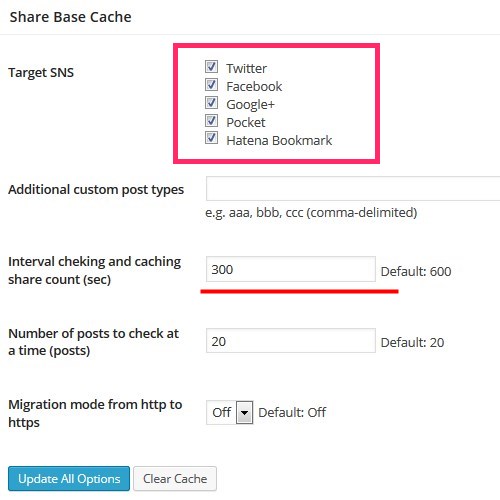 「Follow Base Cache」でFeedlyもチェック、それ以外はデフォルト
※v0.5.0の場合、Facebookのカウントが取得できないときがあります。次のバージョンで改善されるとのこと。Twitter
これでプラグインを使ってSNSのカウントを取得できます。
Facebook
Google+
はてなブックマーク
Pocket
FeedlyicomoonをWordPressに導入
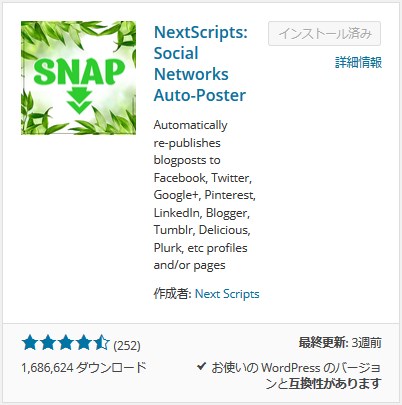
- 2. 「NextScripts: Social Networks Auto-Poster」プラグインのインストールプラグインの新規追加から「NextScripts: Social Networks Auto-Poster」をインストールします。
これはTwitterアプリを作成して、WordPressの投稿をアイキャッチ画像を添付してTwitterに投稿出来るプラグインになります。早速Twitterの専用アプリケーションを作成しましょう。TwitterのDevサイトからアプリを作成
- 3. プラグインへの設定
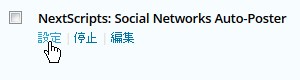
「NextScripts: Social Networks Auto-Poster」の設定をします。
「Add new account」でアカウントを追加します。「Add New Network」をTwitterに設定し、先ほど保存したKeyとURLを入力していきます。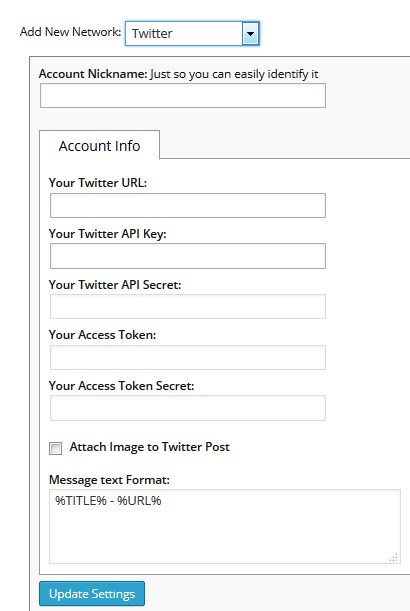 「Attach Image to Twitter Post」にチェックをします。「Message text Format」はお好みで設定してください。
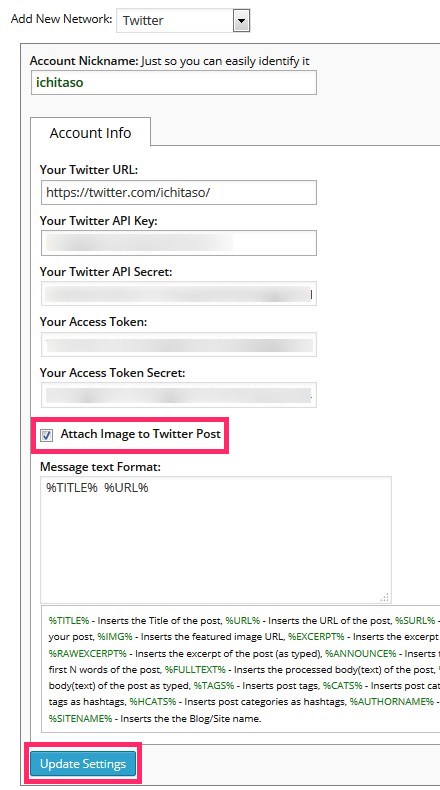
以上で設定完了です!カスタムSNSボタンの作成
SNS Count Cacheのインストール
カスタムSNSボタンを設置するにあたって「SNS Count Cache」プラグインをインストールして、ソーシャルメディアでのシェア数を取得できるようにします。
WordPressのプラグインの追加から「SNS Count Cache」と検索してインストールします。
参考に作者まるぼんさんのサイトを載せておきます。
SNS Count Cache | 試行錯誤ライフハック
インストールするとダッシュボード左側に「SNS Count Cache」の項目が追加されます。
自分の場合、「Settings」から以下のものを設定しています。
「Share Base Cache」で「Target SNS」のすべてをチェックし、「Interval cheking and caching share count (sec)」を300にしています。
「Follow Base Cache」でFeedlyもチェック、それ以外はデフォルト
※v0.5.0の場合、Facebookのカウントが取得できないときがあります。次のバージョンで改善されるとのこと。
Twitter


Facebook


Google+


はてなブックマーク


Pocket


Feedly
これでプラグインを使ってSNSのカウントを取得できます。
icomoonをWordPressに導入
「IcoMoon App」というWebサービスでカスタムSNSボタンのアイコンフォントを作成します。Google+
はてなブックマーク
Feedly
Twitter/Facebook/Google+は既に用意されているので、PocketとFeedlyのアイコンを追加作成します。

今回は以下のものを使わせていただきました。ありがとうございます!
- 自作のWEBアイコンフォントの作り方(無料ツールのみでfeedlyフォントを作る)
Link: 1000×1000pxのfeedly枠なしSVGファイル - ブログのデザインでも使用している「Webフォントアイコン」を本当にオススメしたい! | ドウラク
Link: SNSボタンセット
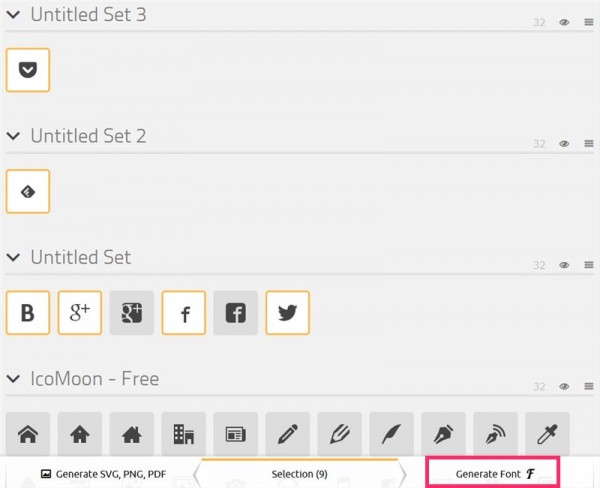
あとはページ下の「Download」をクリックします。
「icomoon.zip」というファイルがダウンロードされるので展開します。
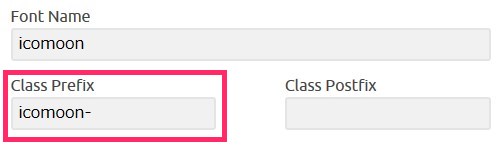
「icomoon」/「fonts」の中身をサーバーにアップロード、style.cssの中身を使用するCSSに追記します。@font-faceのURLの部分はサーバーにアップロードしたURLに書き換えてください。
以上でSNS用のアイコンフォントの準備は完了です。
「NextScripts: Social Networks Auto-Poster」プラグインのインストール
プラグインの新規追加から「NextScripts: Social Networks Auto-Poster」をインストールします。
これはTwitterアプリを作成して、WordPressの投稿をアイキャッチ画像を添付してTwitterに投稿出来るプラグインになります。早速Twitterの専用アプリケーションを作成しましょう。
TwitterのDevサイトからアプリを作成
こちらにアクセスしてTwitterアカウントでサインインし、「Create New App」をクリックします。
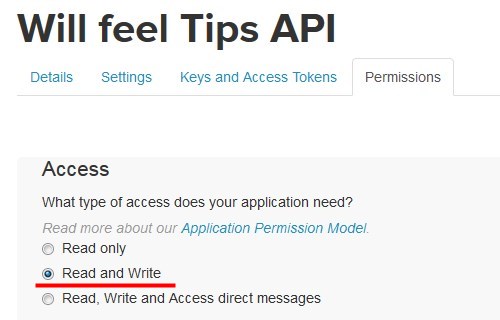
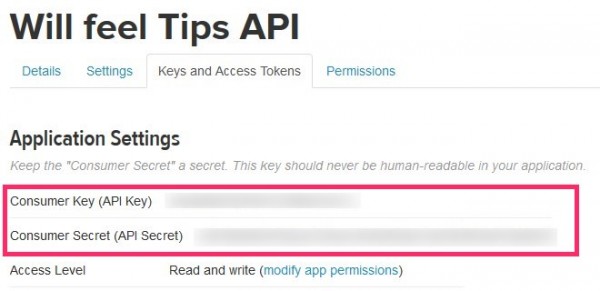
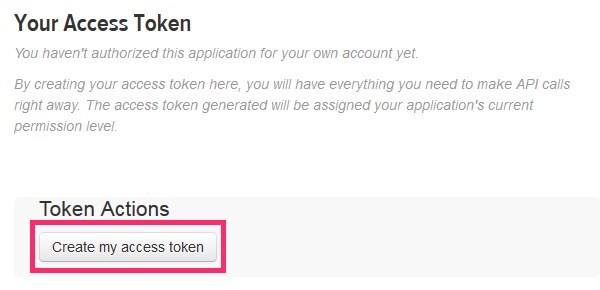
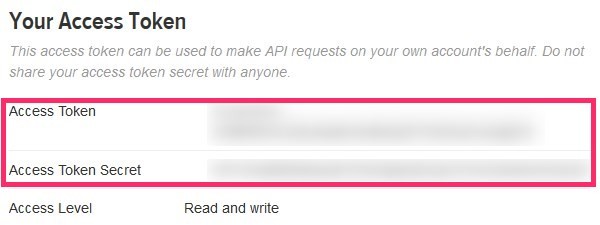
以上でTwitterアプリの準備は完了です。
プラグインへの設定
「NextScripts: Social Networks Auto-Poster」の設定をします。
「Add new account」でアカウントを追加します。
「Add New Network」をTwitterに設定し、先ほど保存したKeyとURLを入力していきます。
「Attach Image to Twitter Post」にチェックをします。「Message text Format」はお好みで設定してください。
以上で設定完了です!
カスタムSNSボタンの作成
単一記事のSingle.phpに設定する方法です。/* アイコンフォント */デザイン/class名は適宜調整してください。
@font-face {
font-family: 'icomoon';
src: url('fonts/icomoon.eot?ukz28k');
src: url('fonts/icomoon.eot?#iefixukz28k') format('embedded-opentype'),
url('fonts/icomoon.woff?ukz28k') format('woff'),
url('fonts/icomoon.ttf?ukz28k') format('truetype'),
url('fonts/icomoon.svg?ukz28k#icomoon') format('svg');
font-weight: normal;
font-style: normal;
}
[class^="icomoon-"], [class*=" icomoon-"] {
font-family: 'icomoon';
speak: none;
font-style: normal;
font-weight: normal;
font-variant: normal;
text-transform: none;
line-height: 1;
/* Better Font Rendering =========== */
-webkit-font-smoothing: antialiased;
-moz-osx-font-smoothing: grayscale;
}
.icomoon-twitter:before {content: "\e607";}
.icomoon-twitter2:before {content: "\ea92";}
.icomoon-facebook:before {content: "\e605";}
.icomoon-facebook2:before {content: "\e604";}
.icomoon-google-plus:before {content: "\e601";}
.icomoon-google-plus2:before {content: "\e602";}
.icomoon-pocket:before {content: "\e608";}
.icomoon-feedly:before {content: "\e609";}
/* SNSボタン */
.clearfix::after {
clear: both;
content: " ";
display: block;
font-size: 0;
height: 0;
visibility: hidden;
}
.sns-box {
margin: 15px 0;
width: 100%;
}
.sns-box .twitter-button, .sns-box .fb-button, .sns-box .gplus-button, .sns-box .hatena-button, .sns-box .pocket-button, .sns-box .feedly-button {
float: left;
margin: 10px 0 10px 10px;
padding: 0;
}
.sns-box .balloon::before {
border-color: #bbb rgba(237, 237, 237, 0) rgba(237, 237, 237, 0);
border-width: 5px;
margin-left: -5px;
}
.sns-box .balloon::after, .sns-box .balloon::before {
border: medium solid transparent;
content: " ";
height: 0;
left: 50%;
position: absolute;
top: 100%;
width: 0;
}
.sns-box .balloon::after {
border-color: #fcfcfc rgba(252, 252, 252, 0) rgba(252, 252, 252, 0);
border-width: 4px;
margin-left: -4px;
}
.sns-box .balloon::after, .sns-box .balloon::before {
border: medium solid transparent;
content: " ";
height: 0;
left: 50%;
position: absolute;
top: 100%;
width: 0;
}
.sns-box .balloon {
background: none repeat scroll 0 0 #fefefe;
border: 1px solid #bbb;
border-radius: 1px;
color: #666;
font-weight: 700;
height: 33px;
position: relative;
text-align: center;
width: 65px;
}
.sns-box .num {
font-size: 13px;
height: 33px;
line-height: 33px;
}
.sns-box .button {
display: block;
width: 65px;
margin: 8px 0 0 0;
background: linear-gradient(to bottom,#FFF,#e5e5e5);
background: -moz-linear-gradient(top,#FFF 0,#e5e5e5);
background: -webkit-gradient(linear,left top,left bottom,from(#FFF),to(#e5e5e5));
border: 1px solid #DDD;
color: #111;
border-radius: 3px;
-moz-border-radius: 3px;
-webkit-border-radius: 3px;
font-size: 14px;
line-height: 17px;
text-decoration: none;
height: 18px;
}
.sns-box .button:hover {
background: linear-gradient(to bottom,#efefef,#dedede);
background: -moz-linear-gradient(top,#efefef 0,#dedede);
background: -webkit-gradient(linear,left top,left bottom,from(#efefef),to(#dedede));
}
.sns-box .button .icomoon-twitter2 {
color: #00abec;
font-size: 12px;
line-height: 17px;
margin: 0 5px 0 3px;
vertical-align: middle;
}
.sns-box .button .icomoon-facebook2 {
color: #4561af;
font-size: 12px;
line-height: 17px;
margin: 0 5px 0 3px;
vertical-align: middle;
}
.sns-box .button .icomoon-google-plus2 {
color: #e26b5c;
font-size: 12px;
line-height: 17px;
margin: 0 5px 0 3px;
vertical-align: middle;
}
.icomoon-hatena::before {
content: "B!";
font-family: Verdana;
font-weight: bold;
}
.sns-box .button .icomoon-hatena {
color: #008fde;
font-size: 12px;
line-height: 17px;
margin: 0 3px;
vertical-align: middle;
}
.sns-box .button .icomoon-pocket {
color: #ee4156;
font-size: 12px;
line-height: 17px;
margin: 0 5px 0 3px;
vertical-align: middle;
}
.sns-box .button .icomoon-feedly {
color: #7bce54;
font-size: 12px;
line-height: 17px;
margin: 0 6px 0 3px;
vertical-align: middle;
}
.sns-box .button .text {
color: #555;
font-size: 10px;
font-weight: 700;
line-height: 17px;
text-align: center;
}
/* SNSボタンここまで */
global $wp_query,$imageUrl;

$postID = $wp_query->post->ID;

if(get_post_meta($postID, 'snapTW', true)) {

$twuserid = 'ichitaso';

$snaptw = get_post_meta($postID , 'snapTW', true);

$unserialize = maybe_unserialize($snaptw);

$twimageid = $unserialize[0]['pgID'];

if($twimageid) {

$imageUrl = 'https://twitter.com/' . $twuserid . '/status/' . $twimageid . '/photo/1';

} else {

$imageUrl = '';

}

} else {

$imageUrl = '';

}

?>
【FeedlyのURL】だけ変更してください。
サイドバーのWidgetにも追加したい場合、「PHP Text Widget」などのプラグインを追加してください。
画像付きツイートボタンを設置する上でのTipsアイキャッチ画像の設定を忘れずに!
画像付きでツイートできるのは「NextScripts: Social Networks Auto-Poster」経由でPostされたもののみ有効です。
最初のうちは自動で投稿されないので、記事を公開したら手動でTweetしてみてください。
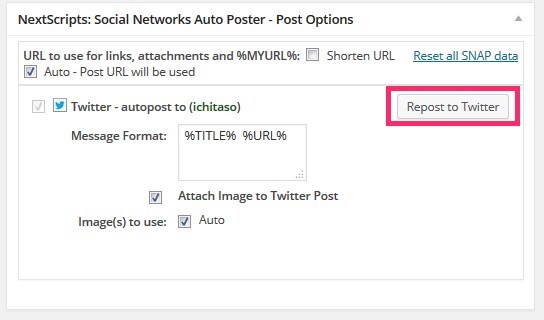 WordPress記事編集画面の下の方にOptionが追加されているので、「Repost to Twitter」をクリックするとアイキャッチ画像が添付されてツイートされます。
また、カスタムSNSボタンを追加すると文字エンコードの関係で「-」ハイフン(マイナス記号)などが文字化けします。
functions.phpに以下を追記して回避してください。
// 特殊文字の変換停止

remove_filter('the_title', 'wptexturize'); // 記事タイトル

remove_filter('the_content', 'wptexturize'); // 記事本文

remove_filter('comment_text', 'wptexturize'); // コメント欄

remove_filter('the_excerpt', 'wptexturize'); // 抜粋
最近は画像付きツイートで記事を紹介する方が増えてきましたね。
FacebookやGoogle+などはOGPで設定した画像がアイキャッチとして表示されますが、Twitterの場合Twitterカードというワンクッション置いたものしか表示されないので、この方法は有用かと思います。
試しにシェアしてみてもらってもいいですよ…///
ではでは!
remove_filter('the_title', 'wptexturize'); // 記事タイトル
remove_filter('the_content', 'wptexturize'); // 記事本文
remove_filter('comment_text', 'wptexturize'); // コメント欄
remove_filter('the_excerpt', 'wptexturize'); // 抜粋